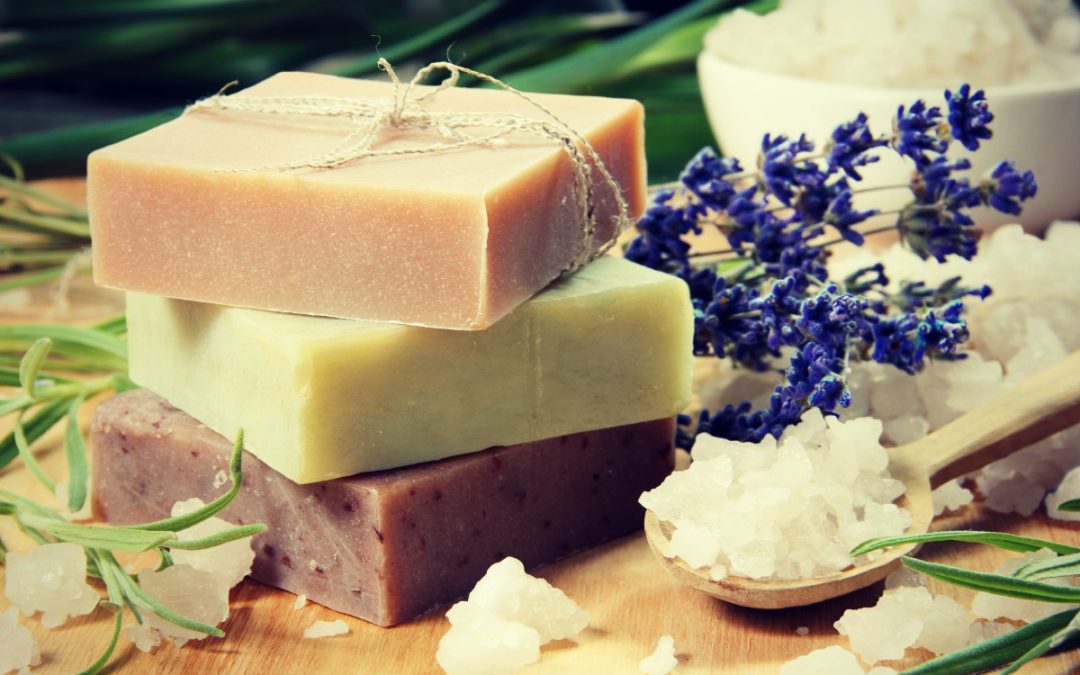
Making your own soap is easier than it may sound. Avoid common chemicals in store bought soap and start making your own personal eco-friendly soap. You’ll see it’s a lot of fun and you can add whatever scent you like. Wrap them up in a lovely gift wrapping to surprise family and friends.
Homemade soaps are good for you, the environment and your wallet. They are cheap to make and good for your body. No harmful chemicals are added. People with a sensitive skin often swear by making their own. On top of that, you’re doing a big favor for mother earth, as homemade soaps lack synthetic materials that are accumulating in our waterways and putting natural resources at risk. So as you can see we both take the benefits, nature, and people.
There are many homemade soap recipes out there to make your own personal and all natural soap. Some use melted base soaps, but I prefer to start from scratch. But as making your soap from scratch means using lye, people get easily intimidated by all the safety rules you have to keep in mind, therefore Friday’s post will be all about soaps made from a base soap.
I like to experiment with different ingredients to create my own personal soap, but if this is your first time, I would recommend to stick to the recipe and start making your own changes after a few batches.
Before we dive into the wonderful DIY world of making your own soap, it is important to mention some basics to keep it safe. You’ll see that if you follow the rules it is an easy, cheap and safe process.
Safety Rules
Soap is generally made from 3 basic ingredients: lye, water, and oils. Concentrated lye is caustic, so avoid getting any on your skin. Lye is the one ingredient why people have stopped making their own soap these days. But when handled with caution, you can enjoy the fun of making your own soap and keep it safe.
The lye reacts with the oils to create soap. This is called saponification. If you measure your ingredients properly, there will be no lye remaining in your final soap product.
People have been making soap at home with lye for centuries without incidents, but it is a dangerous substance, and handling it requires a lot of care and attention. Follow these simple safety rules and nothing can happen to you. I’ve actually never heard of any lye-accident in the news, did you?
- Measuring by volume isn’t that accurate, so I recommend to use a scale to weigh your ingredients.
- Use long tick plastic kitchen gloves to protect your hands and forearms.
- Use protective goggles.
- Do not inhale the fumes and ventilate the room.
- Always buy PURE lye at the store, which is 100% sodium hydroxide, and should contain nothing else. Don’t use drain cleaner or any other item containing lye. They can ruin your soap and damage your skin.
- Protect the working surface with old newspapers, this will also make the cleanup easier.
- Do not use a tin, zinc or aluminum containers, lye reacts with those materials. Use stainless steel instead. Reserve a pot and spoon for making soap.
- Use a container that is big enough to avoid splashes from escaping when stirring or mixing.
- Keep vinegar close by, it neutralizes lye. Use immediately when you made a spill on your skin and rinse with cool water after.
- Never add water to lye, always add the lye to the water. When you add water to the lye, heat will build up and the mixture can erupt like a volcano. So always add the lye to the water and in small portions and with caution.
- Every oil has a different saponification index, this index is a measure of how much lye you need to turn the oil into soap. So if you’re out of coconut oil or any other oil used in the recipe, don’t replace it with any other oil from your kitchen without making a new calculation. If you’re already familiar with making soaps and you want to start experimenting, here is a tool to calculate the amount of lye you need: https://www.thesage.com/calcs/lyecalc2.php
If you don’t want to use lye or you just want a simple craft to do with your kids I’ll give you another safe option to make your own personal soap tomorrow. It is called melt and pour soap (or hand milled soap), which is made exactly as it sounds: by melting down blocks of soap base, adding whatever elements you want, and then pouring it into molds. But that’s for Friday!
Scroll Down for my original soap recipe.

How To Make Your Own Infused Lye Soap From Scratch
Equipment
Make sure you have all equipment at hand before starting.
- Rubber gloves
- Safety glasses
- Large pot, stainless steel or Pyrex
- Kitchen scale
- Thermometer
- Wooden or plastic spoon
- Old stick blender or hand mixer, dedicated to making soap or rinse thoroughly after use
- Mold, you can use a cake pan or any other mold you have at hand (nice molds are available in craft shops)
- Cover for the mold, heavy cardboard or plywood
- Old blanket
Ingredients
- 650 milliliters purified water
- 256 grams lye
- 955 grams olive oil (pomace olive oil works better than the virgin)
- 390 grams coconut oil
- 515 grams of grapeseed oil
- 10 milliliters cinnamon oil or any other fragrance you like (make sure the essential oils are of good quality and can be used on your skin)
Directions
- While wearing safety goggles and gloves, combine lye to the water under constant stirring. Do not breathe in the fumes. Do not throw in all the lye at once. Do this step by step, heat will be generated. Lye and water don’t combine easily. Cool the mixture to 110°F (45°C) before you add the oils.
SAFETY REMINDER: Never add water to lye, always add the lye to the water. When you add water to the lye, heat will build up and the mixture can erupt like a volcano. So always add the lye to the water and in small portions and with caution.
- Mix all the oils in a big pot and warm them to the same temperature as the lye, 110°F (45°C).
- Slowly pour lye mixture into the oils.
- Mix with a stick blender or hand mixer until trace, about 3 minutes. Periodically stop the mixing and scrape down the sides and bottom of the pan with a spatula. (If you don’t have a spare blender or mixer, you can use a whisk, but this will take some time to stir until trace)
- At trace, add 10 milliliters of cinnamon oil and mix as little as possible until combined.
- Pour into mold, cover and wrap in an old blanket for 24 hours to keep the heat in, this will help the reaction between the lye and oils to make the soap.
- When the soap has hardened after 24 hours, cut it into bars and store separately on brown paper in a cool and dark place.
- Turn the bars over after 2 weeks.
- Uses the soap after one month.o
Experimental tips
- When making the soap, always add scented oils at the end of the soap making process to avoid them from evaporating.
- You may replace the water in the recipe with strong herbal teas (lavender, lemon balm, rosemary, etc.), hydrosols or essences. Although using essential oils give a better result than using essences, you can experiment using both.
- To give your soap a special look or scrubby texture, you can add rosemary leaves, lavender or other herbals or fruity leaves or seeds at the end of the soap making procedures. As the soap hardens they will be trapped in your soap.
- The types of fats and oils you experiment with will affect your final product. If you change the fats and oils make sure to recalculate the amount of lye you need for the saponification or soap forming effect (https://www.thesage.com/calcs/lyecalc2.php).
For instance:
àIf you use vegetable oils, your soap will be softer and creamier, therefore I add coconut oil to make it harder.
– If you only use olive oil your soap will be yellow to green in color.
– Some people like to experiment with coconut milk, goat milk, etc.
– Some people like to use beef or pig fat to produce a hard soap. I, personally, never use animal sources, but like mentioned before I add more coconut oil to make a harder soap. It is up to you.
– Once you get used to the soap making process, you can add other stuff like colorants, infusions of all sorts, etc.
So as you can see, when you keep the safety rules in mind, it is a fun, cheap, eco-friendly and easy to make your own soap from scratch. You can be creative and personalize the soaps to your own liking. And they make an excellent gift for family and friends. Did you try these homemade soap recipes? Let me know!
Not sure just yet if you are willing to take the challenge with the lye? No worries Friday’s post will be all about how to craft your own soap without ever having to touch lye.
Do you have any experience with homemade soaps? Please share your tips & tricks and favorite fragrances with us in the comment box below.
Thanks for reading. I hope this information was helpful. Until next time!

Amy Goodrich
Crazy cat lady, life and food lover, certified biologist, and holistic health coach.